ฟอร์ม (Form) เป็นรูปแบบของการกรอกข้อมูลเพื่อส่งข้อมูลเข้าไปประมวลผลในฝั่ง Server โดยอาศัยภาษาที่ทำงานในฝั่ง Server เป็นตัวประมวลผลจากฟอร์ม ก่อนอื่นมาทำความรู้จักกับ Tag ของฟอร์มกันก่อนครับ
<form id= “Id” name= “Name” method= “Method” action= “Action”>
.....
</form>
| Id | คือ | Identify ของฟอร์ม |
| Name | คือ | ชื่อของฟอร์ม |
| Method | คือ | วิธีการส่งข้อมูล มี 2 แบบ คือ post กับ get |
| Action | คือ | ไฟล์ที่รับข้อมูลจากฟอร์มเพื่อไปประมวลผลที่ฝั่ง Server เช่น testProcess.php |
โดยทั่วไปแล้วฟอร์มจะมีอ็อบเจ็คต่างๆ สำหรับรับข้อมูล ซึ่งจะแตกต่างกันไปตามประเภทของข้อมูล เช่น ข้อมูลที่เป็นข้อความยาวๆ ข้อมูลที่เป็นข้อความสั้น เป็นปุ่มกด เป็นต้น ดังนั้นการเรียนรู้อ็อบเจ็คต่างๆ จึงมีความสำคัญก่อนการออกแบบฟอร์มสำหรับกรอกข้อมูลโดยมี
อ็อบเจ็คพร้อมกับแอททริบิวพื้นฐานที่สำคัญ ดังนี้
กล่องข้อความ (Text Field)
<input type= “text” name= “Name” id= “Id” size= “Size”>
| Name | คือ | ชื่อของ Text Field |
| Id | คือ | Identify ของ Text Field |
| Size | คือ | ขนาด ให้ระบุเป็นตัวเลข เป็นความยาวของ Text Field |
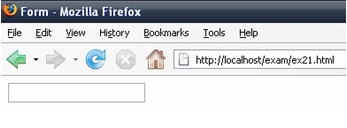
ตัวอย่าง ex21.html
<html>
<head>
    <title>Form</title>
</head>
<body>
    <form id= “test” name= “testForm” method= “post” action= “testProcess.php”>
    <input type= “text” name= “fullname” id= “fullname” size= “20”>
    </form>
</body>
</html>
ผลลัพธ์
******************************************************************************************
ตัวรับข้อมูลแบบซ่อน (Hidden Field)
<input type= “hidden” name= “Name” id= “Id”>
| Name | คือ | ชื่อของ Hidden Field |
| Id | คือ | Identify ของ Hidden Field |
ตัวอย่าง ex22.html
<html>
<head>
    <title>Form</title>
</head>
<body>
<form id= “test” name= “testForm” method= “post” action= “testProcess.php”>
<input type= “hidden” name= “memberId” id= “memberId” size= “20” value= “5”>
</form>
</body>
</html>
ผลลัพธ์ จะเห็นได้ว่า input แบบ hidden จะไม่แสดงให้เราเห็นใน Browser
********************************************************************************************
กล่องรับข้อมูลจำนวนมาก (Text Area)
<input type= “textarea” name= “Name” id= “Id” cols= “Cols” rows= “Rows”></textarea>
| Name | คือ | ชื่อของ Text Area |
| Id | คือ | Identify ของ Text Area |
| Cols | คือ | จำนวนตัวอักษรในแนวนอน หรือขนาดความกว้างของ Text Area นั่นเอง |
| Rows | คือ | จำนวนแถวของอักษร หรือขนาดความสูงของ Text Area |
ตัวอย่าง ex23.html
<html>
<head>
<title>Form</title>
</head>
<body>
<form id= “test” name= “testForm” method= “post” action= “testProcess.php”>
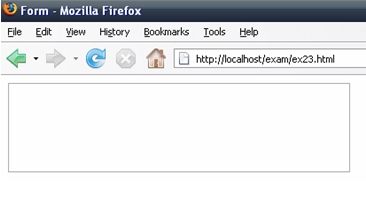
<textarea name= “detail” id= “detail” cols= “45” rows= “5”></textarea>
</form>
</body>
</html>
ผลลัพธ์
ตัวเลือกแบบเลือกได้หลายข้อ (Checkbox)
<input type= “checkbox” name= “Name” id= “Id” checked= “checked”>
| Name | คือ | ชื่อของ Checkbox |
| Id | คือ | Identify ของ Checkbox |
| checked | คือ | กำหนดให้มีการเลือกไว้ก่อน |
ตัวอย่าง ex24.html
<html>
<head>
<title>Form</title>
</head>
<body>
<form id= “test” name= “testForm” method= “post” action= “testProcess.php”>
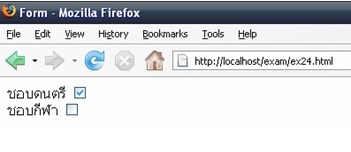
ชอบดนตรี  <input name= “music" type= “checkbox" id= “music" checked= “checked" /><br>
ชอบกีฬา <input name= “sport" type= “checkbox" id= “sport" /></form>
</body>
</html>
ผลลัพธ์
************************************************************************************
ตัวเลือกแบบเลือกได้ข้อเดียวในแต่ละกลุ่ม (Radio Button)
<input type= “radio” name= “Name” id= “Id” checked= “checked”>
| Name | คือ | ชื่อของ Radio Button |
| Id | คือ | Identify ของ Radio Button |
| checked | คือ | กำหนดให้มีการเลือกไว้ก่อน |
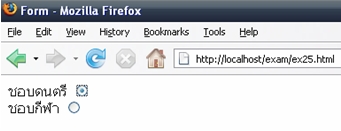
ตัวอย่าง ex25.html
<html>
<head>
<title>Form</title>
</head>
<body>
<form id= “test” name= “testForm” method= “post” action= “testProcess.php”>
ชอบดนตรี  <input name= “gender" type= “radio" id= “gender" checked= “checked" /><br>
ชอบกีฬา <input name= “gender" type= “radio" id= “gender" />
</form>
</body>
</html>
ผลลัพธ์
******************************************************************************
รายการ (List/Menu)
<select name= “Name” id= “Id”>
<option value= “Value1" selected>Label1</option>
     	<option value= “Value2">Label2</option>
</select>
| Name | คือ | ชื่อของ List/Menu |
| Id | คือ | Identify ของ List/Menu |
| Value1 | คือ | ค่าที่ต้องการเมื่อถูกส่งข้อมูลไป |
| Label1 | คือ | ค่าที่ต้องการให้เห็นใน List |
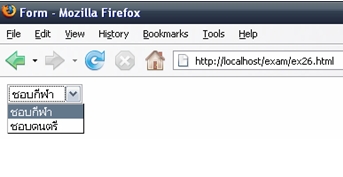
ตัวอย่าง ex26.html
<html>
<head>
<title>Form</title>
</head>
<body>
<form id= “test" name= “testForm" method= “post" action= “testProcess.php">
<select name= “mylike">
	<option value= “sport">ชอบกีฬา</option>
	<option value= “sport">ชอบดนตรี</option>
</select>
</form>
</body>
</html>
ผลลัพธ์
******************************************************************************
ปุ่ม (Button)
<input type= “Type” name= “Name” id= “Id”>
| Name | คือ | ชื่อของ Button |
| Id | คือ | Identify ของ Button |
| Type | คือ | ประเภทของ Button โดยกำหนดดังนี้ button/submit (แบบส่งข้อมูล) /reset (แบบลบข้อมูล) |
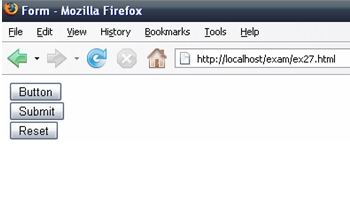
ตัวอย่าง ex27.html
<html>
<head>
<title>Form</title>
</head>
<body>
<form id= “test” name= “testForm” method= “post” action= “testProcess.php”>
<input name= “button0" type= “button" id= “ button0" value= “Button”/><br>
<input name= “button1" type= “submit" id= “ button1" value= “Submit”/><br>
<input name= “ button2" type= “reset" id= “ button2" value= “Reset”/>
</form>
</body>
</html>
ผลลัพธ์
**************************************************************************
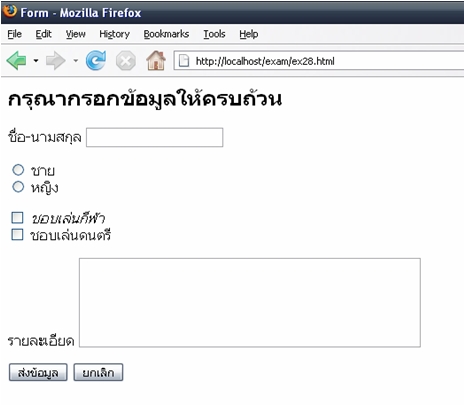
ตัวอย่าง ex28.html
<html>
<head>
<title>Form</title>
</head>
<body>
<h2>กรุณากรอกข้อมูลให้ครบถ้วน</h2>
<form id= “form1" name= “form1" method= “post" action= “testProcess.php">
  <label>ชื่อ-นามสกุล
  <input type= “text" name= “fullname" id= “fullname" />
  </label>
  <p>
    <label>
    <input type= “radio" name= “gender" id= “radio" value= “ชาย" />
    ชาย</label>
    <br />
    <label>
    <input type= “radio" name= “gender" id= “radio2" value= “หญิง" />
    หญิง</label>
  </p>
  <p>
    <label>
    <input name= “sport" type= “checkbox" id= “sport" value= “ชอบเล่นกีฬา" />
    <i>ชอบเล่นกีฬา</i></label>
    <br />
    <label>
    <input name= “music" type= “checkbox" id= “music" value= “ชอบเล่นดนตรี" />
    ชอบเล่นดนตรี</label>
  </p>
  <p>
    <label>รายละเอียด
    <textarea name= “detail" id= “detail" cols= “45" rows= “5"></textarea>
    </label>
  </p>
  <p>
    <input type= “submit" name= “button" id= “button" value= “ส่งข้อมูล" />
    <input type= “reset" name= “button2" id= “button2" value= “ยกเลิก" />
  </p>
</form>

</body>
</html>
ผลลัพธ์


ความคิดเห็น