coming soon
GridView คือ การนำข้อมูลมาแสดงผลแบบตารางที่เราเข้าใจนั่นเอง โดยการเตรียมข้อมูลให้อยู่ในรูปของ DataProvider ซึ่งมี 2 แบบด้วยกันนั่นคือ ActiveDataProvider() ซึ่งได้มาจาก ActiveRecord, ArrayDataProvider() ได้มาจากข้อมูลในรูปของ Array และ SQLDataProvider ได้มาจากการใช้คำสั่ง SQL โดยตรง

คุณสมบัติเด่นของ GridView คือ เรียงลำดับ (Sort) การแบ่งหน้า (Paging) และ ตัวกรอง (Filtering) ด้วยคุณสมบัติเหล่านี้ ทำให้เราสามารถพัฒนา Web Application ได้รวดเร็วมากยิ่งขึ้น
สร้างตารางและข้อมูลทดสอบ
ก่อนอื่นสร้างตาราง product และ category เพื่อใช้ในการทดสอบ สามารถดูเพิ่มเติมได้ในส่วนของ การสร้างและใช้งาน Migration ใน Yii Framework 2
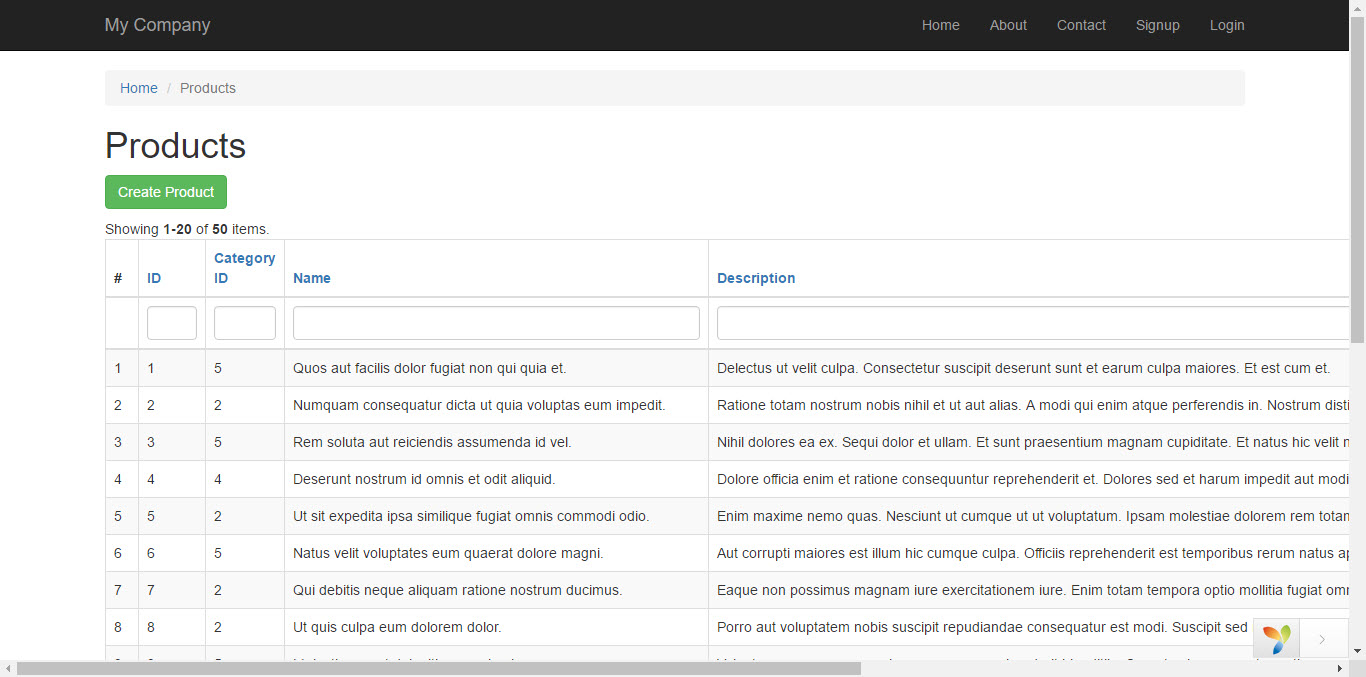
การแสดง GridView
ทำการสร้าง CRUD สำหรับ Product และ Category สามารถดูเพิ่มเติมใน Gii Generator สำหรับ Advanced Template

ปรับแต่ง GridView
ในการปรับแต่ง GridView เราสามารถใช้ anonymous functions เข้ามาร่วมด้วย ในรูปแบบนี้
function ($model, $key, $index, $column) {
    return 'a string';
}
ForeignKey
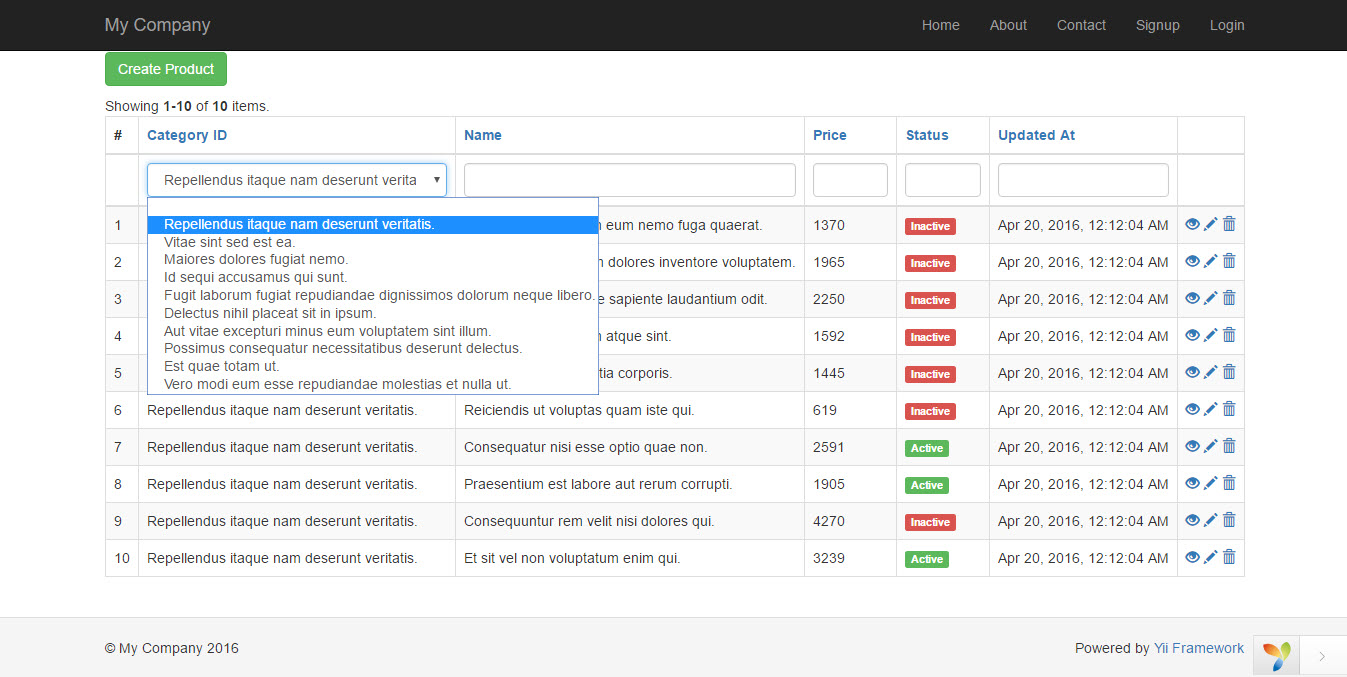
สำหรับ attribute ที่เป็น foreign key นั้นเราจะเห็นเพียงแค่ key ที่ถูกอ้างอิงมา เช่น 1, 2, 3 เป็นต้น ดังนั้นหากเราต้องการแสดงข้อมูลในตารางที่อ้างอิงมาต้องทำการสร้าง Relation ในกรณีนี้คือสร้าง Relation จาก Model Product ไป Model Category โดยแก้ไขที่ ไฟล์ common/models/Product.php
public function getCategory()
    {
        return $this->hasOne(Category::className(), ['id' => 'category_id']);
    }
และ กำหนดการแสดงผลใน GridView สำหรับ attribute category_id ดังนี้
[
                'attribute' => 'category_id',
                'filter' => ArrayHelper::map(Category::find()->all(), 'id', 'name'),//กำหนด filter แบบ dropDownlist จากข้อมูล ใน field แบบ foreignKey
                'value' => function($model){
                    return $model->category->name;
                }
            ],
การแปรผลจากค่าที่เป็นตัวเลขเป็นข้อความ
ในกรณีนี้คือ status ซึ่งเราได้ออกแบบว่า ถ้าข้อมูลเป็น 0 คือ Inactive และถ้าข้อมูลเป็น 1 คือ Active เราก็จะสามารถกำหนดค่าโดยใช้ anonymous functions ดังนี้
[
                'attribute' => 'status',
                'filter' => [0 => 'Inactive', 1 => 'Active'],//กำหนด filter แบบ dropDownlist จากข้อมูล array
                'format' => 'raw',
                'value' => function($model, $key, $index, $column){
                    return $model->status == 0 ? '<span class="label label-danger">Inactive</span>' : '<span class="label label-success">Active</span>';
                }
            ],
การเพิ่ม CheckBoxColumn
CheckBox Column มีไว้สำหรับเลือกแถวที่ต้องการ และส่งค่าไปประมวลผล เช่นนำไปลบ เป็นการเลือกและลบหลายๆ แถวพร้อมกัน เป็นต้น
[
            'class' => 'yii\grid\CheckboxColumn',
        ],
โดยค่าที่ส่งไปจะเป็น array ชื่อ selection[]
การปรับแต่ง ActionColumn
ตัวอย่างการปรับแต่ง
<?= GridView::widget([
        'dataProvider' => $dataProvider,
        'filterModel' => $searchModel,
        'columns' => [
            ['class' => 'yii\grid\SerialColumn'],
            //'id',
            [
                'attribute' => 'category_id',
                'filter' => ArrayHelper::map(Category::find()->all(), 'id', 'name'),//กำหนด filter แบบ dropDownlist จากข้อมูล ใน field แบบ foreignKey
                'value' => function($model){
                    return $model->category->name;
                }
            ],
            'name',
            //'description:ntext',
            'price',
            [
                'attribute' => 'status',
                'filter' => [0 => 'Inactive', 1 => 'Active'],//กำหนด filter แบบ dropDownlist จากข้อมูล array
                'format' => 'raw',
                'value' => function($model, $key, $index, $column){
                    return $model->status == 0 ? '<span class="label label-danger">Inactive</span>' : '<span class="label label-success">Active</span>';
                }
            ],
            //'created_at:date',
            'updated_at:datetime',//การแสดงผลวันที่ตาม format


            ['class' => 'yii\grid\ActionColumn'],
        ],
    ]); ?>


ความคิดเห็น